Bathroom Painting Problems: Bare Plaster, Peeling paint and Mould
Bathroom painting problems nearly always start the same way. Steam builds up, airflow drops, old paint gets weak, and then the surface begins to fail. At first, you might only notice a dull patch or a tiny crack. However, those early signs quickly turn into peeling paint, bubbling, mould, staining or patchy coverage if you ignore them.
The good news is that you can fix most bathroom paint failures once you diagnose the real surface problem. Even better, you can prevent them from coming back when you use the right primer, cleaner and topcoat for a humid room. That matters even more if you are painting bare plaster, because porous plaster will absorb moisture and paint unevenly unless you seal it properly first.
In this guide, I will walk through the most common bathroom painting problems, explain what causes each one, and recommend a practical Zinsser product route for every issue. For a smoother overall finish, pair this advice with our guide to a professional finish on interior walls and avoid the shortcuts in our article on painting mistakes to avoid.
Why bathroom paint fails so often
Bathrooms are hard on paint. First, they face constant swings in temperature and humidity. Then, they collect condensation, soap residue, body oils and cleaning-product buildup. As a result, standard emulsions often struggle if the surface was not cleaned, sealed or primed properly.
According to Zinsser, high humidity and poor ventilation can lead to bubbling, peeling and mould growth, while painting over water residue or soap scum can also damage adhesion. Therefore, the right fix is not just another coat of paint. Instead, you need the right system for the surface underneath.
1. Bare plaster in a bathroom
Bare plaster is one of the biggest trouble spots in bathroom decorating because it is highly porous. In other words, it drinks in paint unevenly. If you paint straight onto it, the finish can dry patchy, flash badly and fail earlier than expected. Worse still, new plaster in a bathroom is dealing with moisture from both the substrate and the room itself.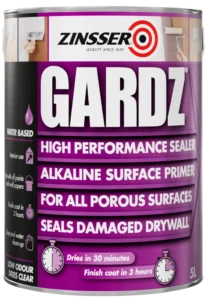
That is why bare plaster needs special attention before you even think about the topcoat. You want to let the plaster dry properly, stabilise the surface and then move on to a bathroom-friendly finish.
Best Zinsser route for bare plaster: Use Zinsser Gardz to seal porous, chalky or new plaster and create a hard, moisture-resistant film. Once the plaster is sealed, finish with Zinsser PermaWhite Satin or PermaWhite Matt depending on the look you want.
Why this works: Gardz is built for porous and problem surfaces, while PermaWhite is designed for high-humidity interiors and helps resist cracking, peeling and blistering. So instead of hoping a mist coat will hold up, you build a more durable bathroom system from the start.
2. Peeling or flaking paint
Peeling paint is one of the most obvious bathroom painting problems. Usually, moisture has worked behind the paint film and broken the bond with the surface. Sometimes the cause is steam. Other times, the real culprit is poor prep, such as painting over loose coatings, glossy patches, soap film or damp plaster.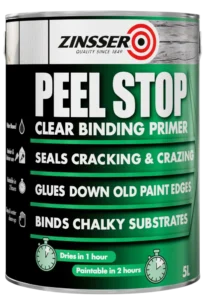
Do not paint over it. Instead, scrape everything back to a firm edge, sand the area smooth and deal with the cause before you repaint. Otherwise, the new finish may look fine for a few weeks and then fail in exactly the same place.
Best Zinsser route for peeling paint: Start by washing the surface with Zinsser Universal Degreaser & Cleaner. After scraping and sanding, use Zinsser Peel Stop on the unstable edges or faulted substrate. Then topcoat with PermaWhite Satin or PermaWhite Matt.
Why this works: Peel Stop is made for peeling, flaking, dusting and chalking surfaces. It binds down weak edges and creates a breathable membrane, which gives the topcoat a sounder base than ordinary emulsion ever could.
3. Bubbling or blistering paint
Bubbling usually means the paint lost adhesion. That can happen because the wall was damp, because the room was used too soon after painting, or because the substrate underneath was too porous and never sealed correctly. In bathrooms, this often shows up on ceilings above showers and on repaired plaster patches.
First, cut out or scrape off the bubbles. Next, check what is underneath. If the bubbling exposed bare, thirsty plaster or skimmed filler, you need to seal that area properly. If it exposed weak, previously painted edges, you need to bind them down before repainting.
Best Zinsser route for bubbling paint: Clean with Universal Degreaser & Cleaner. If the exposed area is porous plaster, prime it with Gardz. If the surrounding paint edges are weak, switch to Peel Stop. Then finish with PermaWhite.
Why this works: The fix changes depending on the surface failure. Gardz handles porous plaster well, while Peel Stop handles loose paint edges well. Using the right primer for the actual substrate is what stops the same blistering pattern from returning.
4. Mould and mildew on walls or ceilings
Mould is common in bathrooms because warm moisture settles on colder surfaces. Even so, many people still make the same mistake: they wipe away the visible marks and paint straight over them. That only hides the problem for a short time.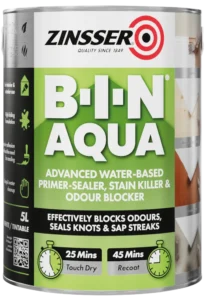
Instead, you need to remove the growth, treat the surface, block any staining and then use a finish built for humid interiors. At the same time, improve ventilation so the coating is not fighting a losing battle.
Best Zinsser route for mould: Treat the area with Zinsser Mould Killer & Remover. If staining remains after treatment, apply Zinsser B-I-N AQUA or COVER-STAIN as your primer-sealer. Then finish with PermaWhite Satin or PermaWhite Matt.
Why this works: Zinsser’s own mould-painting system pairs Mould Killer & Remover with B-I-N AQUA and PermaWhite. That gives you a clearer sequence: kill the growth, block the stain, then apply a mould-resistant finish.
5. Poor adhesion from soap scum, grease or residue
Sometimes the paint itself is not the main problem at all. Instead, the wall was never properly cleaned. Bathrooms collect soap film, shampoo overspray, body oils and cleaning-product residue. Consequently, even a decent coating can struggle to grip the surface.
This is especially common around shower walls, behind basins, near extractor fans and on ceilings that have not been washed before repainting.
Best Zinsser route for dirty or contaminated surfaces: Wash first with Zinsser Universal Degreaser & Cleaner and rinse thoroughly. Then use Bulls Eye 1-2-3 as a bond-coat primer where you want extra adhesion and a bathroom-suitable primer layer. Finish with PermaWhite Satin for a tougher, more wipeable result.
Why this works: Universal Degreaser & Cleaner is made for pre-paint cleaning, and Bulls Eye 1-2-3 is designed to adhere well and is described by Zinsser as ideal for high-humidity areas such as bathrooms.
6. Brown or sticky streaks on fresh bathroom paint
If you see shiny, sticky, tan or brown drips on relatively fresh paint, you may be looking at surfactant leaching rather than mould. This usually happens when water-soluble ingredients in latex paint rise to the surface while the paint is drying in a humid room. Bathrooms are a classic location for it.
Although it looks alarming, the problem is usually cosmetic. Still, it looks messy and can confuse homeowners into repainting too soon, which only makes the finish more vulnerable.
Best Zinsser route for sticky brown streaks: First wash and rinse the surface thoroughly, then let the room dry well before you decide whether repainting is even needed. If you do need to redecorate, clean the area with Universal Degreaser & Cleaner, make sure the residue is gone, and then use PermaWhite Satin once the room is dry and properly ventilated.
Why this works: The key with surfactant leaching is not to trap the residue under fresh paint. Clean first, improve airflow, and only repaint when the room is stable and dry.
7. Water stains or old leak marks
Bathrooms also suffer from previous leaks around showers, pipework, extractor ducts and upstairs plumbing. Even after the leak is fixed, the stain can keep bleeding back through ordinary emulsion. Therefore, a standard touch-up often fails.
Best Zinsser route for water staining: Fix the source of the moisture first. Next, clean the surface and spot-prime the stained area with B-I-N AQUA. After that, repaint with PermaWhite Matt or PermaWhite Satin.
Why this works: B-I-N AQUA is a stain-blocking primer-sealer, so it helps stop old marks telegraphing through the new finish.
A practical Zinsser product map for bathroom painting problems
- Bare plaster or porous repairs: Gardz, then PermaWhite
- Peeling or flaking paint: Universal Degreaser & Cleaner, Peel Stop, then PermaWhite
- Bubbling over porous areas: Gardz, then PermaWhite
- Bubbling over weak old paint: Peel Stop, then PermaWhite
- Mould and mildew: Mould Killer & Remover, B-I-N AQUA or COVER-STAIN, then PermaWhite
- Soap scum and weak adhesion: Universal Degreaser & Cleaner, Bulls Eye 1-2-3, then PermaWhite
- Water stains: B-I-N AQUA or COVER-STAIN, then PermaWhite
How to stop bathroom paint problems coming back
Product choice matters, but preparation and aftercare matter just as much. First, improve ventilation with an extractor fan and open windows when possible. Next, let surfaces dry fully before you start. Then clean thoroughly and prime for the actual substrate, not the one you wish you had. Finally, respect drying and curing time before the bathroom goes back into heavy use.
If the same area keeps failing, check for deeper issues such as failed grout, cracked sealant, leaking pipework or persistent condensation. At that point, it also helps to compare the damage with our guide to the signs your home needs repainting so you can decide whether a local repair is enough or a full refresh makes more sense.
Final thought
Bathroom painting problems are rarely random. Usually, the surface is telling you exactly what went wrong. Bare plaster was left too porous. Old paint was too weak. Mould was not treated. Or the room stayed too damp for too long.
Once you match the problem to the right Zinsser product system, though, the job becomes far more predictable. That means fewer call-backs, better looking walls and a finish that stands up much longer in a humid room.
For official product guidance, see Zinsser’s pages on painting bare plaster, painting over mould, painting surfaces exposed to high humidity, and Benjamin Moore’s overview of surfactant leaching.
Related reading
Professional Finish on Interior Walls | Painting Mistakes to Avoid | Signs Your Home Needs Repainting